
Docker私有化部署Mastodon
本文最后更新于 2025-02-25,文章内容距离上一次更新已经过去了很久啦,可能已经过时了,请谨慎参考喵。
介绍
类推特应用,开源。
与博客是发布网站更新一样,微博是发布到个人资料更新流中的小更新。您可以发布文本帖子,并可选择附加图片、音频、视频或投票等媒体。Mastodon 让您可以关注朋友并发现新朋友。
特点:
- 去中心化
- 和 matrix 一样,支持自部署服务器与其他服务器互联
准备工作
官方说最低配置 2C2G + 2G swap,但实测推荐至少 2C4G 起步。
本文写于 20250221,Mastodon版本是 4.3.3,镜像版本是 mastodon:nightly.2025-02-20。
官方文档里没有写如何 docker compose 部署,本文好多内容都是自己琢磨出来的,可能会失效,因为官方干过修改了默认文件的路径导致版本更新后无法部署的事情。
官方仓库:mastodon/mastodon
官方 yml 配置文件:mastodon/docker-compose.yml
参考文献:
官方文档基本没屁用,压根没写 docker 如何部署,着重看参考文献和本文即可。
# This file is designed for production server deployment, not local development work
# For a containerized local dev environment, see: https://github.com/mastodon/mastodon/blob/main/docs/DEVELOPMENT.md#docker

services:
  db:
    restart: always
    image: postgres:14-alpine
    shm_size: 256mb
    networks:
      - internal_network
    healthcheck:
      test: ['CMD', 'pg_isready', '-U', 'postgres']
    volumes:
      - ./postgres14:/var/lib/postgresql/data
    environment:
      - 'POSTGRES_HOST_AUTH_METHOD=trust'

  redis:
    restart: always
    image: redis:7-alpine
    networks:
      - internal_network
    healthcheck:
      test: ['CMD', 'redis-cli', 'ping']
    volumes:
      - ./redis:/data

  # es:
  #   restart: always
  #   image: docker.elastic.co/elasticsearch/elasticsearch:7.17.4
  #   environment:
  #     - "ES_JAVA_OPTS=-Xms512m -Xmx512m -Des.enforce.bootstrap.checks=true"
  #     - "xpack.license.self_generated.type=basic"
  #     - "xpack.security.enabled=false"
  #     - "xpack.watcher.enabled=false"
  #     - "xpack.graph.enabled=false"
  #     - "xpack.ml.enabled=false"
  #     - "bootstrap.memory_lock=true"
  #     - "cluster.name=es-mastodon"
  #     - "discovery.type=single-node"
  #     - "thread_pool.write.queue_size=1000"
  #   networks:
  #      - external_network
  #      - internal_network
  #   healthcheck:
  #      test: ["CMD-SHELL", "curl --silent --fail localhost:9200/_cluster/health || exit 1"]
  #   volumes:
  #      - ./elasticsearch:/usr/share/elasticsearch/data
  #   ulimits:
  #     memlock:
  #       soft: -1
  #       hard: -1
  #     nofile:
  #       soft: 65536
  #       hard: 65536
  #   ports:
  #     - '127.0.0.1:9200:9200'

  web:
    # You can uncomment the following line if you want to not use the prebuilt image, for example if you have local code changes
    # build: .
    image: ghcr.io/mastodon/mastodon:v4.3.3
    restart: always
    env_file: .env.production
    command: bundle exec puma -C config/puma.rb
    networks:
      - external_network
      - internal_network
    healthcheck:
      # prettier-ignore
      test: ['CMD-SHELL',"curl -s --noproxy localhost localhost:3000/health | grep -q 'OK' || exit 1"]
    ports:
      - '127.0.0.1:3000:3000'
    depends_on:
      - db
      - redis
      # - es
    volumes:
      - ./public/system:/mastodon/public/system

  streaming:
    # You can uncomment the following lines if you want to not use the prebuilt image, for example if you have local code changes
    # build:
    #   dockerfile: ./streaming/Dockerfile
    #   context: .
    image: ghcr.io/mastodon/mastodon-streaming:v4.3.3
    restart: always
    env_file: .env.production
    command: node ./streaming/index.js
    networks:
      - external_network
      - internal_network
    healthcheck:
      # prettier-ignore
      test: ['CMD-SHELL', "curl -s --noproxy localhost localhost:4000/api/v1/streaming/health | grep -q 'OK' || exit 1"]
    ports:
      - '127.0.0.1:4000:4000'
    depends_on:
      - db
      - redis

  sidekiq:
    # You can uncomment the following line if you want to not use the prebuilt image, for example if you have local code changes
    # build: .
    image: ghcr.io/mastodon/mastodon:v4.3.3
    restart: always
    env_file: .env.production
    command: bundle exec sidekiq
    depends_on:
      - db
      - redis
    networks:
      - external_network
      - internal_network
    volumes:
      - ./public/system:/mastodon/public/system
    healthcheck:
      test: ['CMD-SHELL', "ps aux | grep '[s]idekiq\ 6' || false"]

  ## Uncomment to enable federation with tor instances along with adding the following ENV variables
  ## http_hidden_proxy=http://privoxy:8118
  ## ALLOW_ACCESS_TO_HIDDEN_SERVICE=true
  # tor:
  #   image: sirboops/tor
  #   networks:
  #      - external_network
  #      - internal_network
  #
  # privoxy:
  #   image: sirboops/privoxy
  #   volumes:
  #     - ./priv-config:/opt/config
  #   networks:
  #     - external_network
  #     - internal_network

networks:
  external_network:
  internal_network:
    internal: true
如果要支持全文搜索,取消注释 es 部分,和 web 部分的
depends_on -es。
官方的环境配置文件:mastodon/.env.production.sample
参考一下即可,实际上部署的时候要初始化进行生成的。
# This is a sample configuration file. You can generate your configuration
# with the `bundle exec rails mastodon:setup` interactive setup wizard, but to customize
# your setup even further, you'll need to edit it manually. This sample does
# not demonstrate all available configuration options. Please look at
# https://docs.joinmastodon.org/admin/config/ for the full documentation.

# Note that this file accepts slightly different syntax depending on whether
# you are using `docker-compose` or not. In particular, if you use
# `docker-compose`, the value of each declared variable will be taken verbatim,
# including surrounding quotes.
# See: https://github.com/mastodon/mastodon/issues/16895

# Federation
# ----------
# This identifies your server and cannot be changed safely later
# ----------
LOCAL_DOMAIN=example.com

# Redis
# -----
REDIS_HOST=localhost
REDIS_PORT=6379

# PostgreSQL
# ----------
DB_HOST=/var/run/postgresql
DB_USER=mastodon
DB_NAME=mastodon_production
DB_PASS=
DB_PORT=5432

# Elasticsearch (optional)
# ------------------------
ES_ENABLED=true
ES_HOST=localhost
ES_PORT=9200
# Authentication for ES (optional)
ES_USER=elastic
ES_PASS=password

# Secrets
# -------
# Make sure to use `bundle exec rails secret` to generate secrets
# -------
SECRET_KEY_BASE=
OTP_SECRET=

# Encryption secrets
# ------------------
# Must be available (and set to same values) for all server processes
# These are private/secret values, do not share outside hosting environment
# Use `bin/rails db:encryption:init` to generate fresh secrets
# Do NOT change these secrets once in use, as this would cause data loss and other issues
# ------------------
# ACTIVE_RECORD_ENCRYPTION_DETERMINISTIC_KEY=
# ACTIVE_RECORD_ENCRYPTION_KEY_DERIVATION_SALT=
# ACTIVE_RECORD_ENCRYPTION_PRIMARY_KEY=

# Web Push
# --------
# Generate with `bundle exec rails mastodon:webpush:generate_vapid_key`
# --------
VAPID_PRIVATE_KEY=
VAPID_PUBLIC_KEY=

# Sending mail
# ------------
SMTP_SERVER=
SMTP_PORT=587
SMTP_LOGIN=
SMTP_PASSWORD=
[email protected]

# File storage (optional)
# -----------------------
S3_ENABLED=true
S3_BUCKET=files.example.com
AWS_ACCESS_KEY_ID=
AWS_SECRET_ACCESS_KEY=
S3_ALIAS_HOST=files.example.com

# IP and session retention
# -----------------------
# Make sure to modify the scheduling of ip_cleanup_scheduler in config/sidekiq.yml
# to be less than daily if you lower IP_RETENTION_PERIOD below two days (172800).
# -----------------------
IP_RETENTION_PERIOD=31556952
SESSION_RETENTION_PERIOD=31556952
开始部署
先创建一个 mastodon 文件夹,下文均以该文件夹为根目录。
下载官方的 docker-compose.yml 文件,上传到根目录下;
创建一个空文件,名称为 .env.production ;
创建 public 和 elasticsearch 文件夹,并赋予权限:
mkdir public
chown -R 991:991 ./public
mkdir elasticsearch
chown -R 1000:1000 ./elasticsearch
修改 docker-compose.yml 文件,取消注释 es 部分支持全文搜索(可选),其他的基本上没什么要改的,注意 3000、4000、9200三个端口是否被占用即可。
注意 web 服务的
./public/system路径不要修改!这个很重要,否则会没权限。
然后拉取镜像:
docker compose pull
注意这一步是必须的,要先拉取镜像,等会才能进行初始化配置。
单独启动 web 服务来生成配置文件:
docker compose run web bundle exec rake mastodon:setup
需要输入很多东西,但大多数都是直接回车默认,需要注意的就是自定义域名和 SMTP 部分,我的过程:
!!!注意:这个过程必须要复制保存下来,等会要把其中的配置项写进环境配置中。
root@GreenCloud:/opt/1panel/docker/compose/mastodon# docker compose run web bundle exec rake mastodon:setup
[+] Creating 5/5
 ✔ Network mastodon_internal_network  Created                                                                                                    0.1s
 ✔ Network mastodon_external_network  Created                                                                                                    0.1s
 ✔ Container mastodon-redis-1         Created                                                                                                    0.0s
 ✔ Container mastodon-db-1            Created                                                                                                    0.1s
 ✔ Container mastodon-es-1            Created                                                                                                    0.1s
[+] Running 3/3
 ✔ Container mastodon-es-1     Started                                                                                                           0.4s
 ✔ Container mastodon-db-1     Started                                                                                                           0.5s
 ✔ Container mastodon-redis-1  Started                                                                                                           0.5s
Your instance is identified by its domain name. Changing it afterward will break things.
Domain name: m.imbhj.net

Single user mode disables registrations and redirects the landing page to your public profile.
Do you want to enable single user mode? No

Are you using Docker to run Mastodon? Yes

PostgreSQL host: db
PostgreSQL port: 5432
Name of PostgreSQL database: postgres
Name of PostgreSQL user: postgres
Password of PostgreSQL user:
Database configuration works! 🎆

Redis host: redis
Redis port: 6379
Redis password: Qwertyuiop@123
Redis connection could not be established with this configuration, try again.
ERR AUTH <password> called without any password configured for the default user. Are you sure your configuration is correct?
Try again? Yes
Redis host: redis
Redis port: 6379
Redis password: qwertyuiop
Redis connection could not be established with this configuration, try again.
ERR AUTH <password> called without any password configured for the default user. Are you sure your configuration is correct?
Try again? Yes
Redis host: redis
Redis port: 6379
Redis password:
Redis configuration works! 🎆

Do you want to store uploaded files on the cloud? No

Do you want to send e-mails from localhost? No
SMTP server: smtpdm.aliyun.com
SMTP port: 80
SMTP username: [email protected]
SMTP password:
SMTP authentication: plain
SMTP OpenSSL verify mode: none
Enable STARTTLS: auto
E-mail address to send e-mails "from": [email protected]
Send a test e-mail with this configuration right now? no

Do you want Mastodon to periodically check for important updates and notify you? (Recommended) Yes

This configuration will be written to .env.production
Save configuration? Yes
Below is your configuration, save it to an .env.production file outside Docker:

# Generated with mastodon:setup on 2025-02-21 02:03:41 UTC

LOCAL_DOMAIN=m.imbhj.net
SINGLE_USER_MODE=false
SECRET_KEY_BASE=xxx
OTP_SECRET=xxx
ACTIVE_RECORD_ENCRYPTION_DETERMINISTIC_KEY=xxx
ACTIVE_RECORD_ENCRYPTION_KEY_DERIVATION_SALT=xxx
ACTIVE_RECORD_ENCRYPTION_PRIMARY_KEY=xxx
VAPID_PRIVATE_KEY=xxx=
VAPID_PUBLIC_KEY=xxx
DB_HOST=db
DB_PORT=5432
DB_NAME=postgres
DB_USER=postgres
DB_PASS=xxx
REDIS_HOST=redis
REDIS_PORT=6379
REDIS_PASSWORD=
SMTP_SERVER=smtpdm.aliyun.com
SMTP_PORT=80
[email protected]
SMTP_PASSWORD=xxxxxx
SMTP_AUTH_METHOD=plain
SMTP_OPENSSL_VERIFY_MODE=none
SMTP_ENABLE_STARTTLS=auto
[email protected]

It is also saved within this container so you can proceed with this wizard.

Now that configuration is saved, the database schema must be loaded.
If the database already exists, this will erase its contents.
Prepare the database now? Yes
Running `RAILS_ENV=production rails db:setup` ...


I, [2025-02-21T02:04:09.100099 #191]  INFO -- : [dotenv] Loaded .env.production
Database 'postgres' already exists
Done!

All done! You can now power on the Mastodon server 🐘

Do you want to create an admin user straight away? Yes
Username: admin
E-mail: [email protected]
I, [2025-02-21T02:04:47.765497 #6]  INFO -- : [ActiveJob] Enqueued ActionMailer::MailDeliveryJob (Job ID: 21f36b59-b3d5-4153-93da-72304aa63dc2) to Sidekiq(mailers) at 2025-02-21 03:04:47 UTC with arguments: "UserMailer", "welcome", "deliver_now", {:args=>[#<GlobalID:0x00007fad39b042d8 @uri=#<URI::GID gid://mastodon/User/1>>]}
You can login with the password: xxx
You can change your password once you login.
root@GreenCloud:/opt/1panel/docker/compose/mastodon#
重要信息我用 xxx 代替了,不知道为啥 redis 的密码不让设置,可以看出我尝试了两次都失败了,所以就没设置,密码是空。
然后打开 .env.production 文件,把刚才 Generated with mastodon:setup 步骤显示的这些配置都复制进去!
# Generated with mastodon:setup on 2025-02-21 02:03:41 UTC

LOCAL_DOMAIN=m.imbhj.net
SINGLE_USER_MODE=false
SECRET_KEY_BASE=xxx
OTP_SECRET=xxx
ACTIVE_RECORD_ENCRYPTION_DETERMINISTIC_KEY=xxx
ACTIVE_RECORD_ENCRYPTION_KEY_DERIVATION_SALT=xxx
ACTIVE_RECORD_ENCRYPTION_PRIMARY_KEY=xxx
VAPID_PRIVATE_KEY=xxx=
VAPID_PUBLIC_KEY=xxx
DB_HOST=db
DB_PORT=5432
DB_NAME=postgres
DB_USER=postgres
DB_PASS=xxx
REDIS_HOST=redis
REDIS_PORT=6379
REDIS_PASSWORD=
SMTP_SERVER=smtpdm.aliyun.com
SMTP_PORT=80
[email protected]
SMTP_PASSWORD=xxxxxx
SMTP_AUTH_METHOD=plain
SMTP_OPENSSL_VERIFY_MODE=none
SMTP_ENABLE_STARTTLS=auto
[email protected]
和最好和官方的示例
.env.production文件对比一下。
然后把 es 的配置加进去:(可选,如果 docker-compose.yml 文件没有取消注释 es 的部分,不用添加)
# Elasticsearch
ES_ENABLED=true
ES_HOST=es
ES_PORT=9200
ES_USER=elastic
ES_PASS=xxxxxxxxx
全部的配置:
# https://docs.joinmastodon.org/admin/config/ for the full documentation.
# Generated with mastodon:setup on 2025-02-21 02:03:41 UTC

# 域名
LOCAL_DOMAIN=m.imbhj.net
# 单用户模式,设置为 true 禁止注册
SINGLE_USER_MODE=false
# 密钥
SECRET_KEY_BASE=xxxxxxxxx
OTP_SECRET=xxxxxxxxx
ACTIVE_RECORD_ENCRYPTION_DETERMINISTIC_KEY=xxxxxxxxx
ACTIVE_RECORD_ENCRYPTION_KEY_DERIVATION_SALT=xxxxxxxxx
ACTIVE_RECORD_ENCRYPTION_PRIMARY_KEY=xxxxxxxxx
VAPID_PRIVATE_KEY=xxxxxxxxx
VAPID_PUBLIC_KEY=xxxxxxxxx
# PostgreSQL
DB_HOST=db
DB_PORT=5432
DB_NAME=postgres
DB_USER=postgres
DB_PASS=xxxxxxxxx
# Redis
REDIS_HOST=redis
REDIS_PORT=6379
REDIS_PASSWORD=
# SMTP
SMTP_SERVER=smtpdm.aliyun.com
SMTP_PORT=80
SMTP_LOGIN=xxxxxxxxx
SMTP_PASSWORD=xxxxxxxxx
SMTP_AUTH_METHOD=plain
SMTP_OPENSSL_VERIFY_MODE=none
SMTP_ENABLE_STARTTLS=auto
SMTP_FROM_ADDRESS=xxxxxxxxx
# Elasticsearch(可选)
ES_ENABLED=true
ES_HOST=es
ES_PORT=9200
ES_USER=elastic
ES_PASS=xxxxxxxxx
检查没问题之后,启动容器:
docker compose up -d
将域名反代到 http://localhost:3000 端口,访问。
如果发现 es 的容器一直在重启,看一下容器日志,是什么报错,我遇见的问题如下:
1、权限问题:
uncaught exception in thread [main]
ElasticsearchException[failed to bind service]; nested: AccessDeniedException[/usr/share/elasticsearch/data/nodes];
解决办法:
chown 1000:1000 -R ./elasticsearch
2、虚拟内存不够:
ERROR: [1] bootstrap checks failed. You must address the points described in the following [1] lines before starting Elasticsearch.
bootstrap check failure [1] of [1]: max virtual memory areas vm.max_map_count [65530] is too low, increase to at least [262144]
ERROR: Elasticsearch did not exit normally - check the logs at /usr/share/elasticsearch/logs/es-mastodon.log
解决办法:
echo "vm.max_map_count=262144" >> /etc/sysctl.conf
sysctl -w vm.max_map_count=262144
3、Java 内存问题:
initial heap size [134217728] not equal to maximum heap size [536870912]; this can cause resize pauses and prevents mlockall from locking the entire heap
解决办法:(修改 docker-compose.yml 文件)
es:
  restart: always
  image: docker.elastic.co/elasticsearch/elasticsearch:7.17.4
  environment:
    - "ES_JAVA_OPTS=-Xms512m -Xmx512m -Des.enforce.bootstrap.checks=true"
如果 es 的容器一切正常,进入 web 容器,建立索引:
tootctl search deploy
Elasticsearch 全文搜索 很占内存,如非必要,可以不开。
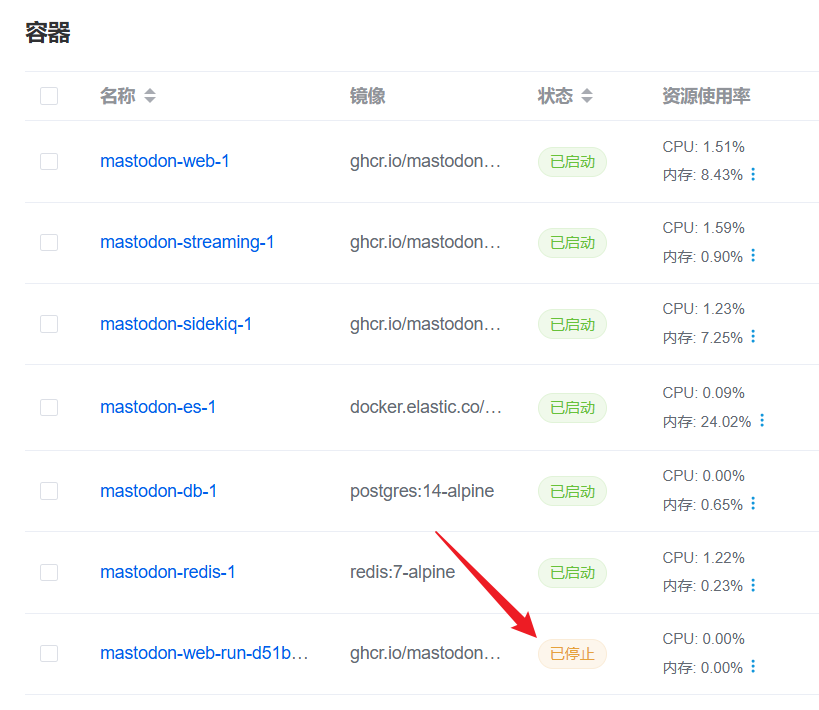
哦对了,这个容器显示已停止是正常的,用来初始化的,不用管:
设置
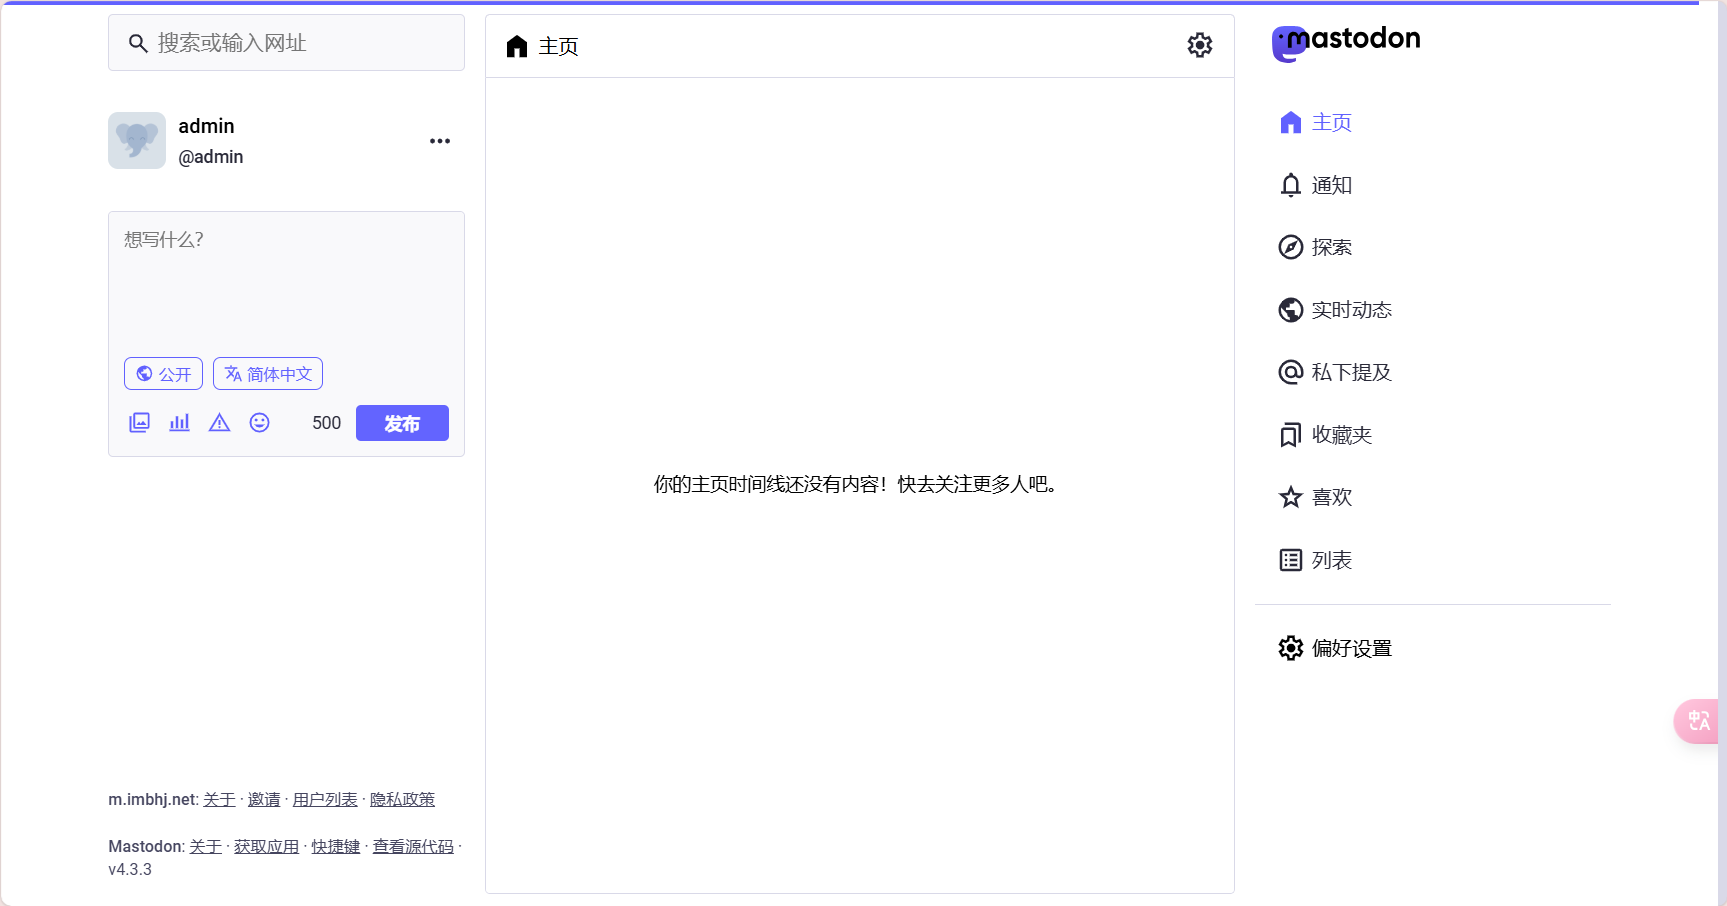
访问之后选择登录,按照初始化配置过程中设置的管理员用户和密码进行登录,登陆后如下:
如果在设置过程中发现 无法保存,网页上提示报错:
We're sorry, but something went wrong on our end.
那么大概率是 public/system 文件夹没有权限,重新赋权,重启即可:
docker compose down
cd ./public
chown -R 991:991 ./system
cd ../
docker compose up -d
打开偏好设置 - 账号,修改初始密码。
打开偏好设置 - 管理,进入管理员界面,如果提示需要建立搜索索引,进入 web 容器,执行:
tootctl search deploy --only=instances accounts tags statuses public_statuses
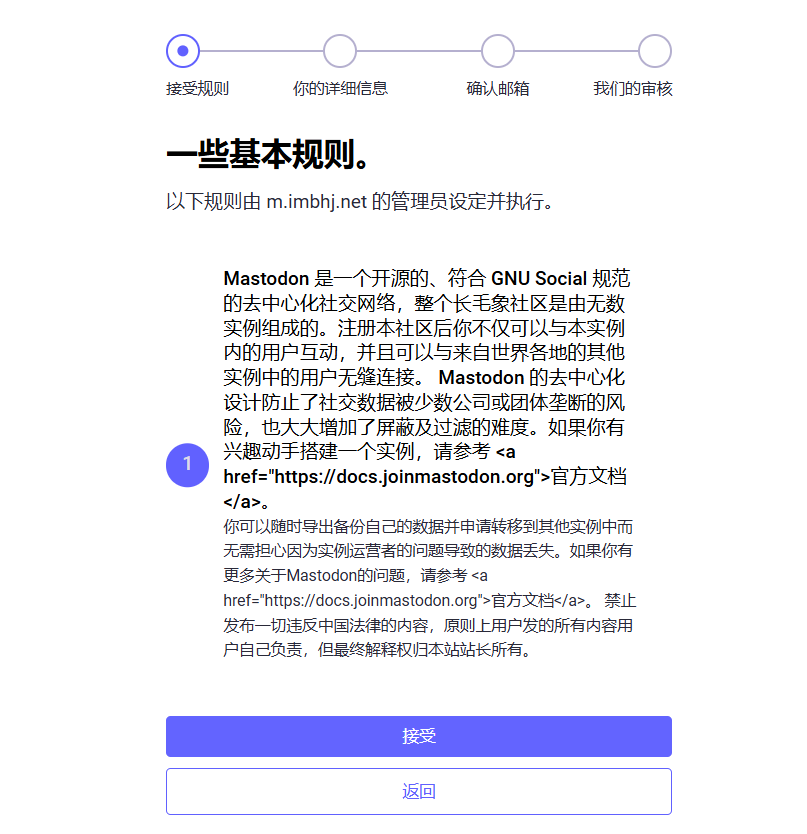
打开偏好设置 - 管理 - 实例规则,设置相应的说明:
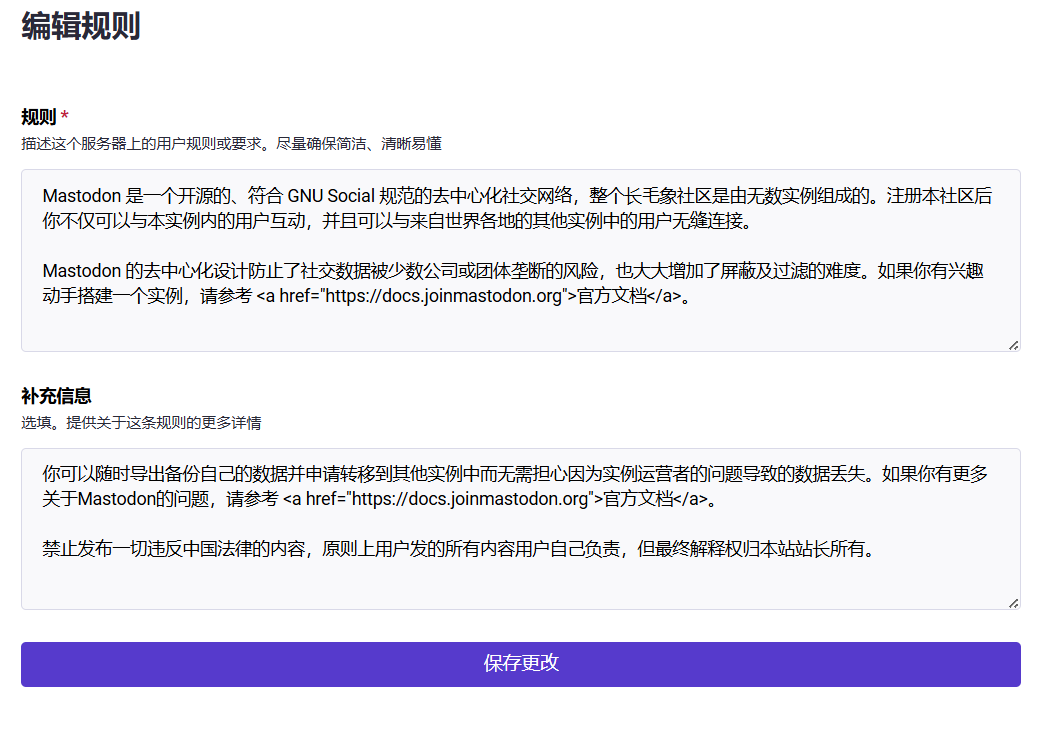
这里只是举例,实际型式可以不必拘泥,就是用户条例的自定义和扩充。
这个规则是用来注册用户的时候提示的,效果如图:
打开偏好设置 - 管理 - 服务器设置,修改一些自定义配置。
需要注意的是,服务器设置中的 用于联系的公开用户名 选项必须为社区中已有的用户名。
中继站
中继站是什么?它就像一个广播台,向所有订阅它的站点发送这些站点用户发送的公开嘟文。
未订阅中继时: 你站的跨站时间轴 = 你站所有用户关注的用户发表的公开嘟文 + 你站用户回复、转发的公开嘟文
订阅中继后: 你站的跨站时间轴还会加上所有订阅该中继的站点所发表的公开嘟文。
由此可以看出,中继站可以为小型站点提供丰富的信息流,让大家可以看到更多其他站的内容。但在开启中继前,自己的 CPU、内存和储存需要有一定的余量,否则大量信息流很有可能导致其崩溃。
如何加入中继?很简单,点开 首选项 - 管理 - 中继站,添加中继地址即可。
目前中文世界一个比较大型的中继站地址为:https://mastodon-relay.moew.science/inbox,因为比较大也比较活跃,对服务器要求较高。
推荐几个其他的中继站:
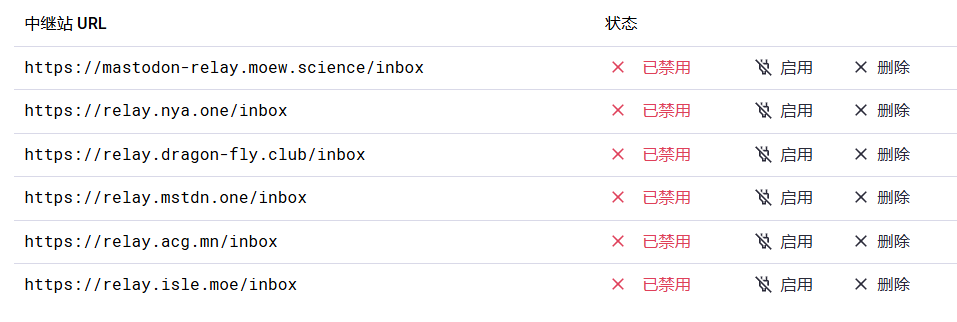
并不是不能用,已经亲测都可用,只不过是我自己 服务器压力比较大,所以暂停中继了。。。
存储清理
Mastodon 的跨站轴机制决定了会有很多来自其他站的远程媒体文件,如果不执行清理,它们有可能会塞爆你的存储导致媒体功能受到影响,因此经常清理/设置一个定时清理也很重要。
一些经常会用到的清理相关 tootctl 命令(进入 web 容器内部执行),介绍来自官方:
tootctl media usage:计算被 Mastodon 消耗的硬盘空间。tootctl cache clear:清除缓存存储。tootctl media remove --days=0:移除本地缓存的其它实例媒体附件,需要指定天数,0 则代表清理全部。tootctl media remove-orphans:扫描出不属于任何媒体附件的文件并移除他们。请注意,某些存储提供商会对列出对象所必需的 API 收取费用。另外,此操作需要遍历每个文件,因此速度很慢。tootctl statuses remove:从数据库中删除未被引用的嘟文,例如来自中继的或来自本地用户不再关注的用户的嘟文,同时没有被回复的或以其他方式与之互动的。这是一个计算量很大的操作,其会开始之前创建额外的数据库索引,并在结束后删除它们。默认清除 90 天之前的嘟文,也可以通过–days来进行指定,例如tootctl statuses remove –days30。